Sunday, 1 February 2026

Sherwood AX-4050R Repair

[Bear in mind I don't really know what I'm doing here!]

A Sherwood X-4050R amplifier.  Pretty sure it was purchased from Richer Sounds in the late 1990s or early 2000s.    No power at at all - the red standby light wasn't illuminating.

It turned out to be small standby transformer on the power supply PCB: The primary side had gone open circuit.   (Should have been about 1300ohms on that side, based on a 600-and-something measurement from the centre pin.  The secondary side was about 13 ohms if I recall.)

The transformer (kind of dark and cracked on the plastic top) is labelled 2828090901.  You can google but there's not much help.   

Based on looking at the service manual (which is available if you search - though it's poor enough resolution that reading it is a challenge) the transformer needs to supply something like a 13.5v output that will:
a) be used to supply 12v for the purposes of engergising the relay when it's time to switch on properly, and
b) will feed into a GD7806 to supply 6v for the standby circuitry.

Research told me that a 240v primary 9v secondary transformer might be good enough (because it'll give out more than 9v when under the full rated load).  However, finding one that fits was difficult and I couldn't find one with the same pin positions regardless.   The size seems to be an EI30 / EI 30 (the 30 being approximate millimetres).  I skipped over a few that seemed to have obviously bad efficiency ratings (because as a standby transformer it's theoretically going to permanently on) and ended up buying a Myrra 44158.   

It fits in the gap on the circuit board and while the pins definitely are _not_ in the right places, since I was unresolved on any other mechanism to mount and connect it, I tried bending the pins to make them fit to the nearest holes on the PCB.  I managed it - it was definitely one of those times where I felt like I was on the edge of snapping things off - and then when soldering in did a bit of bridging across some of the holes/tracks.  (The board had 3 holes on the primary side and 4 on the secondary I think, but only 2 on each side were used.)

Anyway!  Once fired up, I got a standby light. 

I played some audio into the headphones and was getting some audio distortion.  I was worried that the transformer was underpowered, but managed to take some measurements (on the connector that goes to the front board) of 18v and 6v in standby, and 13v (and a bit) and solid 6v with the amp turned on and powering headphones.  I started playing with the knobs and switches and it seemed to be mostly a dodgy "Direct" (latching push) button.    I didn't fancy my chances of finding matching replacement and figured I could live without the Direct and Loudness options, so I bridged the pins so they were connected in the "off" positions and I desoldered the other leg (hopefully stopping the signal from every also going down the Direct path, say.)

The amp seems to be working nicely.   

I note that the original transformer is marked as a "safety" part in the service manual, which I think means it's part of the device's accreditation and should only be swapped for an exact replacement.  The Myrra transformer is inherently short-circuit-proof and self-extinguishing or something.  It doesn't contain a fuse like the old one (that presumably caused the problem in the first place), but obviously I'm just an amateur playing around with my own equipment for my own purposes here - I'm not saying you should do what I did :-)


Wednesday, 22 June 2022

Windows VPN gives a connection to the remote computer could not be established error.

...and then a helpful "You might need to change the network settings" suggestion.   No other details are provided by the message. 


Of course, you don't need to change the network settings.   The fix for me was the delightfully simple solution 1 on this page:

https://thegeekpage.com/fix-vpn-error-a-connection-to-the-remote-computer-could-not-be-established-in-windows-10/

Basically, delete the miniports in Device Manager then do a scan for hardware changes.  Next connection attempt worked flawlessly.


Monday, 28 June 2021

Dynamics 365 CRM "Workflow Expansion" task

 You might see it fleetingly in the System Jobs, or less fleetingly if you end up with a "WorkflowExpansion" Failed job in the logs.

The best explanation for what this task is, even 12 years later, seems to be here:


https://cloudblogs.microsoft.com/dynamics365/no-audience/2009/06/24/microsoft-dynamics-crm-4-0-iworkflowcontext-interface/

To paraphrase:  It's the plug-in that's registered on an entity when you've got one or more asynchronous workflows that are triggered on changes to that entity, and it queries to find out which workflows should actually be run and runs them.

(I'm only looking because we've got some failed entries in the logs.  I guess that means that any workflows that should have been run for the related entity based on that update.... haven't been.)

Thursday, 28 January 2021

SSRS with Dynamics 365 / CRM and multi value parameters not setting their defaults correctly

Scenario:

(Search keywords:  SSRS multi-value-parameter hard-coded values default value FetchXML CRM)

I've created a multi value parameter and manually entered lots of labels/values.

I've gone to the default tab and picked on one of the values.

Copied the changed report up to the CRM using the XRMToolbox ReportSync tool.

Run the report - the default(s) aren't as wished (or in my case didn't seem to have worked at all) so I changed them, re-pushed, and they still don't work.

Issue:  A little exploratory testing seemed to indicate that the CRM isn't paying any attention to changes in the default value(s) when I push the new version of the report up.  (Note that I'm not doing a publish all because there are other users on the system - not sure if that would have made a difference.)

Solution:  Or one, and easy in my case because I'm trying to get the parameter defaults sorted before I've actually used it anywhere:  Change the parameter name and re-push.  (Then change it back again if you want.)  

[There might be other solutions like changing some of the values - not sure.]

Thursday, 13 February 2020

Gen2 2007 Prius Front Right ABS Sensor

So I've bought what I hope is an aftermarket Gen2 2007 Prius Front Right ABS Sensor (wheel speed) off Ebay.

I reckon the correct Toyota part number for this (right-hand-drive) car is 8954247020 or 89542-47020.
This part is made by Herth+Buss and according to the web has part number J5912045 or EAN 4029416234959, but the only number I can see printed on it is on the lead where it says
Herth+Buss 2973600-1019 - a number unknown to Google!

I just stuck a multimeter across the plug's contacts and that gave me an ohm resistance reading of 1.57 ohms.    (I saw a youtube video where the bloke was replacing one - might have been on the Gen3 - and his new one had a resistance similar to mine;  the one he took off measured 2-point-something, I think.)

I'll be getting the garage to fit this soon (when they replace a caliper that appears to be binding and causing some unnecessary heat and some very unnecessary intermittent wheel-squeaking) so I don't know if this is going to fix the problem yet.  (That goes for the caliper too :-(  )
However, the garage told me the wheel teeth are okay, and this part cost me about £40 instead of the genuine Toyota part's £200+, so I figure it's worth a shot.


UPDATE:  Replacement part now fitted and I got the garage to give me the old sensor back.  It registers 1.64 ohms and varies (just a little bit, somewhere less than 0.1 ohms?) when I flash my keys or something else metal across it.   
That doesn't inspire much hope that we've fixed the problem therefore, but what might give me a little bit of hope is that the end of the little metal pin on the sensor does appear to have a little gouge / scratch across it - like it's come into contact with something on its travels.
I'll have to wait till I've taken the car on the motorway to see if it's worked.
(The garage reported that the old caliper was definitely binding, but that pads and disc are still currently okay - so good news on that front.)

FURTHER UPDATE:  I had two problems with the old sensor: the car would shudder coming to a low-speed stop as the ABS decided it needed to kick in and out a bit, even with a gentle slow down (come to think of it, the ABS has always been a little eager to kick in when stopping since I first got the car);  the ABS warning lights would come and and stay on when I got to (let's say around) 70 mph.)   The new sensor has definitely fixed the low speed stopping issue;  however, when I get to (let's say a fast) 70mph the ABS light has still come on.  (It almost always automatically resets after a restart or two, whereas it used to hand around longer than that before.)   My conclusion:  Yep, the old sensor was a bit dodgy, but I suspect there's a small bit of damage to the toothed wheel too - probably should have got the garage to replace that at the same time, regardless of the garage's assurances.  [Mind you - I haven't checked the price of one!]

Wednesday, 5 June 2019

Rank / Execution Order of synchronous / real-time workflows in Dynamics 365

There's a "rank" field in the sdkmessageprocessingstep entity.  (You can see the entity through Advanced Find but you don't seem to be able to access that field, which has a display name of Execution Order.)


I'm using online Dynamics 365 / CRM / Customer Engagement,
Version 1710 (9.1.0.5424) online

XrmToolBox has an "Synchronous events execution order" plug-in that (as of XrmToolBox version 1.2019.2.32 with Synchronous events execution order editor v 1.2016.8.23) lets you connect and set the rank on synchronous workflows (note that they only appear registered on the create event of the entity) but FAILS TO READ the existing rank out of the CRM correctly.

You can confirm the rank has been set by creating a solution, adding your workflow, then exporting.
Customizations.Xml contains (e.g.)
<StateCode>1</StateCode>
<StatusCode>2</StatusCode>
<Rank>50</Rank>
<RunAs>1</RunAs>
<IsTransacted>1</IsTransacted>


[Maybe see also...
https://docs.microsoft.com/en-us/dynamics365/customer-engagement/developer/entities/sdkmessageprocessingstep#BKMK_Rank
and the one sensible answer on
https://community.dynamics.com/crm/f/117/t/154063 ]

Tuesday, 19 March 2019

Virtualbox Copy and Paste not working - it's Excel?!

Just thought I'd post here since I've found no other hits:

I've used Virtualbox (on Windows) for years and copying and pasting (of text, anyway) always seems to have gone through phases of working consistently well or not working at all.

Anyway, I'm now running a Windows 7 VM on a Windows 10 host and 've noticed that the thing that breaks copy and paste appears to be using Excel on the guest machine.

After breaking it, killing and restarting vboxtray appears to work for about one copy and paste (but maybe only in the host->guest direction).   
Rebooting (just) the guest doesn't seem to fix it - I think I need to reboot the host as well (which I tend to do infrequently).

I'm still running with the obvious solution at the moment: avoid using Excel on the guest.

Thursday, 8 February 2018

I was going to post this on a Samsung(USA) site where I found a thread, but it was so bloody awkward to create an account / sign in that I couldn't be bothered to complete the process.

Anyway

(SOLVED for me - posting just in case it helps) 

I've been having the wi-fi "internet not available" issue for a solid week now on my UK Samsung Galaxy S7.  Won't stay "connected" for more than a few minutes usage.  All other devices seem fine.

The problem appears fixed (or at least the phone has remained happily working for several hours) after I:

Firstly:  Went into settings -> apps -> (...) -> show system apps -> Bluetooth Share and first force stopped, then cleared data.   (I found this suggested as a solution elsewhere.  It did not appear to fix it for me - but I can't rule out the fact that it's involved.)

Secondly:  Went to my wi-fi router's config and DHCP-reserved an IP address for the S7's MAC.   I was careful to pick a *different* IP address from the one the phone was currently using.      Rebooted router (which was required to apply the reservation), turned off the phone's wi-fi (I was actually connected via a different access point, not directly to the router), turned the wi-fi back on once the router was available.

I confirmed that the phone had picked up the new, different IP.  No problems since!

Cheers.

Tuesday, 23 May 2017

It's always your ADFS certificates!

Despite the fact that the error message in the event logs for your Microsoft Dynamics CRM 2013 on-premise installation say...
28005
Cannot execute as the database principal because the principal "dbo" does not exist, this type of principal cannot be impersonated, or you do not have permission.

...you'll find when you finally enable tracing with the crmdiagtool that the error in the CRM logs instead says....

System.IdentityModel.Tokens.SecurityTokenException: ID4175: The issuer of the security token was not recognized by the IssuerNameRegistry. To accept security tokens from this issuer, configure the IssuerNameRegistry to return a valid name for this issuer.

The solution (and you're even more annoyed because you've tried all the bits of it except clicking through the claims-based wizard in the CRM Deployment Manager:

Update the federated metadata on the two relying party trusts in ADFS manager;
Click through the claims-based authentication wizard AND the IFD wizard in CRM;
Restart ADFS Service;
Restart IIS;
(Try all 4 again if it still doesn't' work...)
and now you're all good!

Monday, 27 February 2017

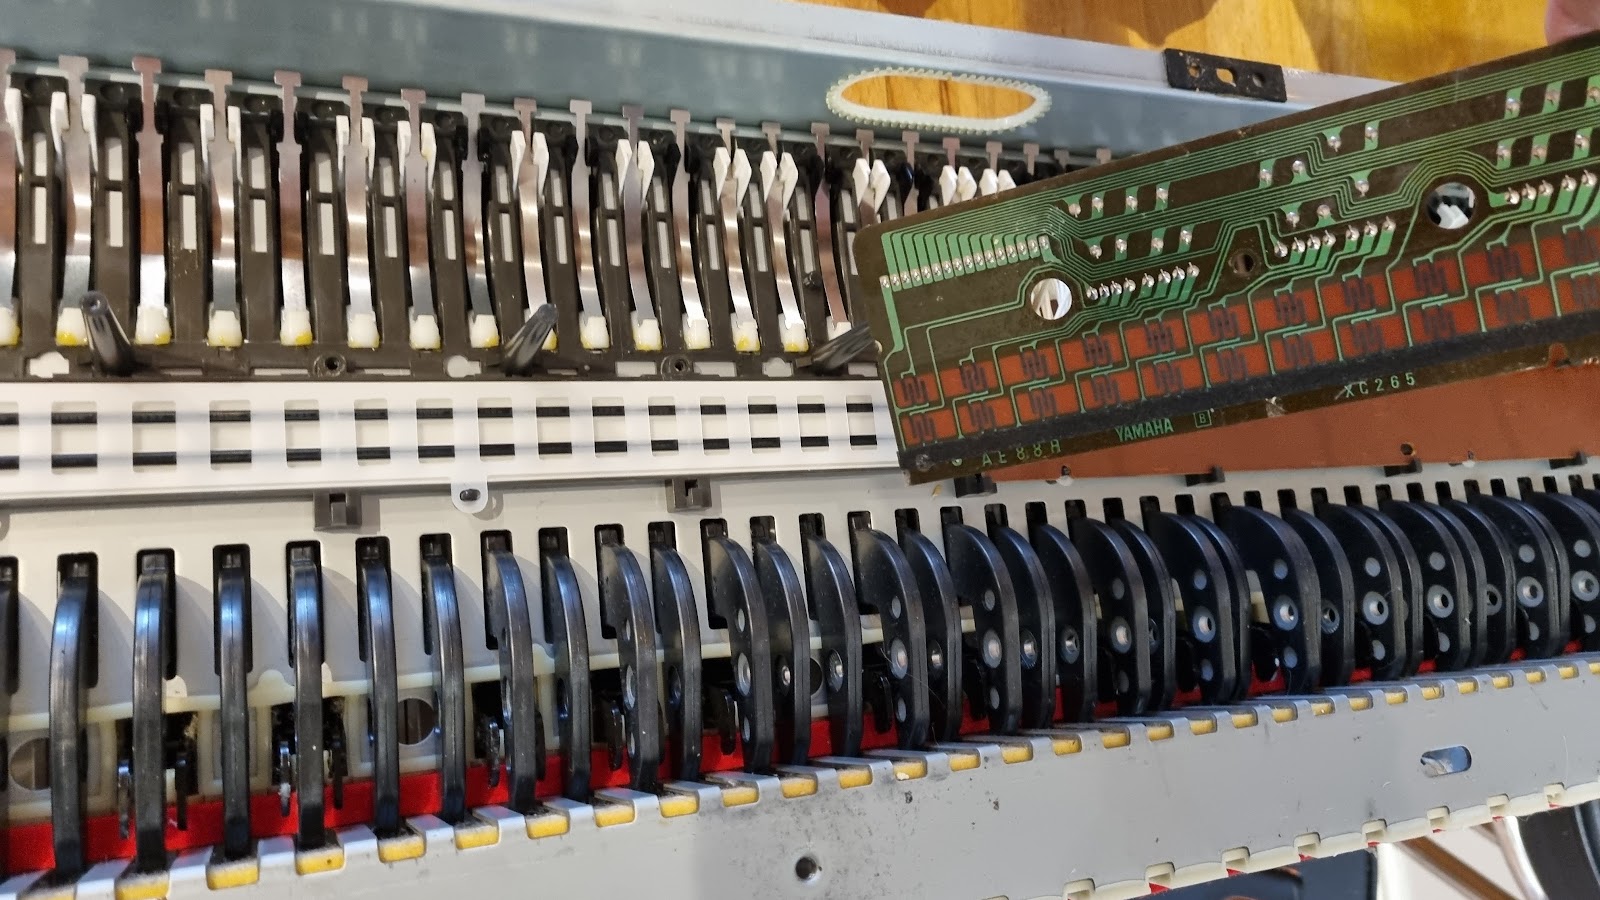
Yamaha Clavinova CVP-8 power supply fault fixed!

My (previously parents') Yamaha Clavinova CVP-8 must be 25 years old now.  It had been getting into the habit of cutting out after it'd been on a while:  all the lights would go off and the buttons would be unresponsive, there'd be no sound from the keys but a gentle background buzz from the speakers.
If you turned it off and on again immediately then you'd get a gentle pop and all the same non-working symptoms, but if you left it off for a bit it tended to start working again, presumably as it cooled down.  However after a while it stopped the "starting working" again and was basically broken.

[Make sure you know how to be safe with mains electronics before you go doing this - there are dangerous voltages inside.]
Opening up the lid was a case of four screws on the underside, but the two at the rear are inaccessible while it's properly mounted on the stand just to make things more difficult.
Anyway, I'd found the power supply board with the big capacitors on it and I'd replaced those because I know that caps are often the thing that go bad in old electronics.  Unfortunately, this made no difference (though the piano did briefly start working again just to throw me off the scent).  FYI: The big cap in the bottom right of the board was charged to 20v and retained that voltage for at least a couple of days - nice big spark when I shorted it (so use a resistor)!

However, after another session of fiddling and some lucky turning on and off of the piano I worked out that my issue seemed to be that when it was working the machine had 2v or 4v (I think it was AC) measurable at (both sides of) the fuse towards the rear (using the metal heatsink case of that board as ground), and when it wasn't working it had 0v.    I traced the track on the underside of the PCB back to one of the end pins of the connector on the RHS of board - this was a wire directly from the big transformer, so I figured either the transformer was broken or... did that solder joint look slightly less than perfect through a magnifying class?  Turned out it was!  I resoldered all the joints on the bottom of the (what was it, 7 or 8 pin) connector and my Clavinova is working again!

PS  Credit to Yamaha for building a piece of kit that lasts this long.

(Other notes:  The rectifier near the connector gives out about 20v on the rear-right and the front-left pins.  I measure the cap of the (now replaced) big capacitor at the bottom right of the board and it was at 20v while the machine was on.  However,  the identical big cap next to it (by its "cap") was at 0v - not sure what that's about.  Off to the left two of the other 3 or 4 bigger caps were at 8v and 6v and the other two were 0v, I think.)

Friday, 26 August 2016

Chrome's task manager doesn't appear when using the Shift+Escape shortcut keys

...but does work when selected from the menu.
There are (or used to be?) problems with some sites like GMail, however Shift + Esc didn't work for me anywhere.
As helpfully suggested by Bruce at https://bugs.chromium.org/p/chromium/issues/detail?id=317276#c15 , if you've got Intel Management and Security stuff on your machine then by default it will have usurped the shortcut.  Change it in the Intel settings.

Tuesday, 26 April 2016

SharePoint 2013 CSOM: Prevent last-modified and last-modified-by (or whatever they're called) from changing when updating programmatically.

Simply doing a
sharePointItem["Editor"] = sharePointItem["Editor"];
sharePointItem["Modified"] = sharePointItem["Modified"];
before the
sharePointItem.Update();
context.ExecuteQuery();
seemed to work for me on a Document Library.  

(I tried "Last_x0020_Modified" first which I got from a list of fields somewhere and that gives an error about..."not existing or might be read-only"?)

Also note that there appear to be other "modified"-type fields on a Document Library that might be for search, but I haven't felt the need to understand those.


Monday, 18 May 2015

Delonghi Magnifica Coffee Machine Test mode, etc.

My EAM3200S goes wrong infrequently - and every time it does I have to re-scour the web for these details.   (It might have been easier to find them each time if they weren't from a German site in German.)

Test modes and reset combinations are in the below, which comes from http://www.kaffee-welt.net/index.php/Thread/1087-DeLonghi-Reparatur-und-Wartung-Sammelthread-zur-ersten-Hilfe/ , translated via Google at http://translate.googleusercontent.com/translate_c?depth=1&hl=en&prev=search&rurl=translate.google.co.uk&sl=de&u=http://www.kaffee-welt.net/index.php/Thread/1087-DeLonghi-Reparatur-und-Wartung-Sammelthread-zur-ersten-Hilfe/%3Fs%3Df2e07e7fb1488382bea0fb66d6538b502ce00a2f&usg=ALkJrhgzhPuTdNVmCtVNN7ByjXdhfcVeng
(Thanks - I mean Danke - to the folks (Volks?) at Kaffee-welt.net.)


This thread is to give a first overview for self-help in repairing a DeLonghi-VA. The following information are currently available:
1. Information for descaling
2. How can you retrieve the references when DeLonghi VAs?
3. test modes to the first failure diagnosis
4. display and key test
5. Resets
1. Information for descaling:
A KVA must be descaled regularly. The DeLonghi-VA of the hardness of the tap water must be adjusted so that the machine asks regularly for timely descaling.

-What Is a hardness range?
Water is divided ° dH (= degree of German hardness) in different degrees of hardness with the unit. This classification describes, roughly speaking, the dissolved in water ions of alkaline earth metals. The individual degrees of hardness are often divided for ease in 4 different hardnesses:

Hardness 1 = hardness range 1 = less than 7 ° dH
Hardness 2 = hardness range 2 = 7 ° - 14 ° dH
Hardness 3 = hardness range 3 = 14 ° - 21 ° dH
Hardness 4 = hardness range 4 = over 21 ° dH

Since May 2007 a further simplified subdivision applies:

soft = less than 8.4 ° dH
medium = 8.4 14 ° dH
hard = more than 14 ° dH

DeLonghi working at his machine with the above 4 hardness ranges. The appropriate range of hardness must be set in the machine. One need not even use the machine enclosed gauge strip whose inaccurate application very quickly leads to errors. Easy does it, if you call the local water utility or on the website looking at the water analysis.

-In What my hardness DeLonghi-VA wants to be when decalcified?

The request descaling is issued at certain intervals, or after a certain amount of water. Specifically, this means:

Hardness 4 (very hard) - - -> for each 40 liters
Hardness 3 - - -> for each 70 l
Hardness 2 - - -> for each 130 l
Hardness 1 (very soft) - - -> for each 250 l
Note: Use only in terms of steam these values ​​in half, as the steam heating system seems to be more sensitive to lime.

- Can I decalcify with citric acid?

Yes, in principle, yes, but only with the devices called "ESAM", because the stainless steel waterways are not attacked in the heating block by the ZS. The situation is different in the "EAM" of devices, which can enforce the ZS aluminum Theroblock strong.
A further disadvantage of citric acid: The lime is only partly dissolved, not dissolved. This may have the consequence that Kalkbröckchen lines and valves could clog! If you want to descale sure who would rather elect a descaler amidosulphonic basis.


2. How can you retrieve the references when DeLonghi VAs?
It's always very interesting to see how many coffee has been related with its fully automatic. In DeLonghi this interest is very large, because the 3-year warranty is limited to 5000 cups. One could see the number of prepared cups, would have also an estimate of how long it still has warranty on the device. The covers can be retrieved at many DeLonghi devices only with a trick.

View references for devices without display
The following procedure does not seem to be working on all models without display, just try if it works. Even with the newer models with ECO button it does not work at all.
Pull out the plug
Press "ON / OFF" and "coffee" keys simultaneously and insert plug
Release all buttons
Press and hold button "ON / OFF"
The five alarm lights are now from right to left and enter the number of cup. (Between the change from one to the next lamp is a little break)
Draw the process to fail mains plug and plug it in again


Amount of water for units without Dispöay read Thanks to Hari.Seldon for the tip!

Pull out the plug
Press "ON / OFF" and "coffee" keys simultaneously and insert plug
Release all buttons
Press and hold steam button
The five alarm lights are now from right to left and enter the amount of water in liters. (Between the change from one to the next lamp is a little break)
Draw the process to fail mains plug and plug it in again


Decalcification for devices without displays Thanks to Hari.Seldon for the tip!

Pull out the plug
Press "ON / OFF" and "coffee" keys simultaneously and insert plug
Release all buttons
Press the "1 cup" and keep
The five alarm lights are now from right to left and enter the number of decalcification on. (Between the change from one to the next lamp is a little break)
Draw the process to fail mains plug and plug it in again


Number of cleanings read Thanks to Michael2 for the tip!

Pull out the plug
Press "ON / OFF" and "coffee" keys simultaneously and insert plug
Release all buttons
Press the "2 cups" and keep
The five alarm lights are now from right to left and enter the number of decalcification on. (Between the change from one to the next lamp is a little break)
Draw the process to fail mains plug and plug it in again


For devices without display and with the "ECO" button (from model year 2010) one proceeds as follows:
Pull out the plug
Press "ON / OFF" and "ECO" button simultaneously and insert plug
Release all buttons
Press and hold button "ON / OFF"
The five alarm lights are now from right to left and enter the number of cup. (Between the change from one to the next lamp is a little break)
Draw the process to fail mains plug and plug it in again


Example:
The lamp on the far right lights 3x, take the next left 2X, the next left 1x,
one to the left 4X: results in the following numbers: 4123 cups

Show covers for devices with display
When ESAM 4300 (not EAM) can read the cover when performing these steps:
Switch off the machine
Pull out the plug
ON / OFF and coffee powder, simultaneously press and hold down and plug in the mains plug again
Release the buttons
Press ON / OFF and hold
The 5 warning lights will flash with each break from right to left and enter the total number of withdrawals at. Here is an example: all right lamp flashes 2x, 4x the next, in turn, the next and the next 6x 1x. This gives the number 1642
To exit the display, pull the power plug and plug it in again


The following procedure applies to models EAM / ESAM 3400/4400/3500/3600/4400/4500:
Switch off the machine
Pull out the plug
MENU and CHANGE keys simultaneously holding down and plug in the mains plug again
Appears "TOT COFFEE" (number of total coffee remuneration) and "DEAD WATER" in the display (permeated liters of water)
Press NEXT
The display shows "DESCALING" (number of previously conducted decalcification) and "washing" (number of executed cleaning programs, only customer not private)
Press NEXT
Appears "TOT Cappuccino" (number of related cappuccino) in the display
To exit the menu, pull the power plug and plug it in again


In the machines of the 5xxx series (production date before the end of 2008 and at the Prima Donna (ESAM 6600) The procedure is as follows:
Switch off the machine
Pull out the plug
P and hot water simultaneously press and hold down and plug in the mains plug again
press for advancing SINKS
To exit the menu, pull the power plug and plug it in again


When Primadonna Avant (ESAM6700) and since the end of 2008 at the ESAM models 5xxx, you can first see the references directly into the machine menu without tricks and double bottom. This option is located in the settings under the menu item "Statistics" and is also mentioned in the manual.

Display covers at ECAM 22.110
In the ECAM 22,110 you can read the cover when performing these steps:
[List]


Mains plug, power switch on "off" position
"Press switch + steam simultaneously, let down, this power switch back to position" On / Off "
Release the buttons
[/ List]


Keep the following keys pressed, respectively:
Single cup coffee = number covers
Circle drops = number decalcification
Vapor cloud = liters of water

It captured these symbols individually to flash, where:
Delta = 1 Series
Water tank = 10
Marc container = 100
Eco = 1000

eg: triangle lights 3x, 4x Water tank lights, grounds container lights up 2x, 1x Eco lights provides the number: 1,243 Covers


3. test modes for fault diagnosis

3.1 Test mode machines without display
The following describes how to activate the test mode:
Pull out the plug
Simultaneously press buttons "1 cup" and "steam" and hold
Insert the mains plug, continue to hold key pressed
Once the "1 cup", "2 cups" and "steam" key lights up shortly (take some), release the keys
Now the test mode is active.

These tests can now be performed:

Poti (= knob on the front) test:
Press the on / off button and hold, then turn one of the knobs to the right and left. If the light at "1 cup", the minimum potentiometer value is reached, lights "2 cups" the mean value, "steam", the maximum value lights.

With the flush button, you can heat the thermal block. As long as the purge button is pressed, it heats up and the two cups-LEDs light up. When the target temperature is reached, go off both LEDs.

Supplements of member "wadriller" to Poti-test on a ESAM 4300:
If you turn the pot for the amount of water, the lamps "fill water" - "Empty Spent Coffee" - "General fault".

Brewing method test (Brühgruppenmotortest):
Button for 1-cup dispensing push - Start> BG
Button for 2-cup dispensing push - runterfahren> BG

Grinder function test:
By pressing the button the powder grinder is activated as long as the key is pressed.

Pump Test:
By pressing the "rinse" button runs the pump. Before the brew group must be moved to the upper position! When not plugged water reservoir Please only short test, so that the pump does not run dry for too long, as it takes damage otherwise!

The test mode you leave by simply pulling the power plug.

Thanks to coffee uncle, provided the original knowledge of the Brühgruppentest.

Declaration on the test mode when the machine with display:
In test mode, the display shows only the operation to perform: eg EV1 or EV2 on, vaporizers on, pump on, Grinder on, motor up and down, Heater on. You have to check if the process is actually running itself yet. Example: Display Vaporizer (steam heater) on. Now check that the steam heating is also hot.

3.2 Test mode ESAM 3400/4400/3500/3600/4500
Pull out the plug
Simultaneously press keys "small cup" and "large cup" and hold
Insert the mains plug, continue to hold key pressed
Once "Lode Test Mode" is displayed, the keys can be released.
Now the test mode is active.

Pressing the "small cup", the solenoid valve 1 (MV1) are tested.
Pressing the "large cup", the solenoid valve 2 (MV2) are tested.
With the other buttons, the further testing may be carried out: brewing process, heating unit heater, steam heater heating etc.
Pull out the plug in order to exit the test mode.

Thanks to Wobbuffet from which comes the knowledge of the test mode with the devices mentioned above.

3.3 Test mode ESAM 5500
Unplug power cord
Simultaneously held down the "1-cup dispensing" button and "water"
Be stuck plug
wait until the test mode appears, then you can release the keys.


The following functions can be tested using the buttons:
1 cup -> EV1
2 cups -> BG-motor down and up
Hot water -> pump
Cappuccino -> Steam (Vaporizer)
On / off button -> EV1 + EV2
P -> heater (Heater)
Rinse button -> grinder
Bean button (coffee strength) -> EV2

3.4 Test mode ESAM 5600
Pull out the plug
Is Insert the mains plug and main switch to "ON", wait until the Dispplay dark again
Open service door
"P" key, "1-cup dispensing" and "Flush" button simultaneously for more than 5sec. pressed
It appears on the display "Select Test"
Close service door


The following tests can be started:
Key Test: Press the "Caffeelatte"
Delivery status: Press the "Latte Macchiato"
Component Test: Press the "Cappuccino"

In component test following components can be tested:
Brewing method: using the "latte" (high) and "Milk" (down)
Thermo block: Press the "P"
Steam heating on: Press "Right circle" (to the right of "flushing")
Pump: Press "left circle" (the left of "flushing")
A grinder: Press the "Latte Macchiato"
Solenoid valves EV1 (rear valve): Press the "1 cup"
Solenoid valves EV2 (front valve): Press the "2 cups"
Off solenoid valves together: key "Cappuccino"

Many thanks to "noispe" for this information and his efforts. A PDF of him to test mode found here: kaffee-welt.net/index.php?page=Thread&postID=68967#post68967

3.5 Test mode ESAM 6600 (prima donna)
Pull out the plug
Keep key "2 small cups" and "2 large buttons" simultaneously
Insert the mains plug
It appears on the display "Load Test Mode"
Release the buttons


Brewing method: using the "1 large cup" and "2 large cups"
Thermo block: Press the "P"
Steam heating a: "Flush" button
Pump: Press the "water"
Grinder on: Press "Aroma selection / coffee"
Solenoid valves EV1 + EV2 on: Press "Cappuccino"
Single solenoid valves: "1 cup" -> EV1 and "2 small cups" -> EV2

Leave test mode: unplug and plug it back in

3.6 Test mode ESAM 6700 (Primadonna Avant)
Insert the mains plug and main switch to "I"
Open service door
Hold together as long as the keys "quantity selection" + "1 cup" and "long" until "Select Test" appears on the display
Close service door, then press "Cappuccino" button, it should "Lad Test Mode" appear in the display
The test mode is active

The following functions can be tested using the buttons:
Caffee Latte: no function
Cappuccino: EV1 + EV2
Latte Macchiato: grinder
Milk: brewing unit downwards (Motor down -> Limit Switch Down)
Beans amount (ESC): brewing unit upward (engine up -> Limit Switch Up)
Heating thermoblock: P (left arrow)
Rinse (right arrow): heating steam heating
Of choice: Pump
1 cup: EV1
2 cups (OK): EV2
Long: no function

Leave test mode: Power switch to "0"

An illustrated guide to the test mode, the ESAM 6700 has created Kaffecarn as PDF, you'll find the download in this post: [solved] Delonghi ESAM 6700 Prima Donna, general disturbance can not be eliminated, need some tips or reset function, who can help

3.6 Test mode ESAM 6900

A guide to the test modes in ESAM6900 found here: DeLonghi ESAM 6900 test modes

Thanks to manic8800 for creating the PDF !!

3.8 Test mode ECAM 23.450 / 23.420
Switch off the machine (rear) but leave power cord plugged
simple cup + steam simultaneously
Main switch to 1
The test mode is now active

The following functions can be tested using the buttons:
Reset button -> EV1 + EV2
P -> Heating
Rinse -> grinder
1 cup -> EV1
2 cups -> BG-motor down and up
Steam -> pump
Coffee strength -> EV2
Cappuccino -> Steam
In the 23.420 there is the Einschaltkombi Rinse + steam simultaneously because you get into a ELECTRIC TEST MODE.
There briefly MW is automatically activated and the BG goes a complete cycle.


4. display and key test for models with display
After the display test to get automatically
in the initial start-up, where you can set the language and
must then deflate. For German approx 5s press OK.


4.1 display and key test for models ESAM 3400/4400/3500/3600/4500

Pull out the plug
Simultaneously press keys "mean cup" and "large cup" and hold
Insert the mains plug, continue to hold key pressed
Once "Lode Test Mode" is displayed, the keys can be released.


Now the display test is active, pressed keys are also displayed.

Pull out the plug to exit.

Thanks to Wobbuffet from which comes the knowledge of the display and key test for the devices listed above.

4.2 Enable display and key test in 5500:


Pull out the plug
While holding key "2 cups" and "hot water"
Insert the mains plug
It appears on the display "Display Test Mode"
Release the buttons

Activate 4.3 Display and Keys Test in 6600:

Pull out the plug
Keep key "1 small cups" and "1 large buttons" simultaneously
Insert the mains plug
It appears on the display "Display Test Mode"
Release the buttons


Activate 4.4 Display test mode for the 23 420:

Switch off the machine (rear) but leave power cord plugged
2Tassen + steam simultaneously
behind the main switch to 1
in 23.420 you can then test the microswitch of steam knob, upon actuation is in the display "Knob is open"


5. Resets
There are various machine states / errors, where one only progresses with a reset. So if nothing else will work, maybe helping one of the following reset further:

5.1 Machine without display:

1.) KVA unplug (plug out)
2.) On / Off + Tasse1 + Tasse2 simultaneously.
3.) KVA connect to the electricity grid.
Flashing 4.) Once Tasse1 + Tasse2 + steam LEDs simultaneously, release.
- The machine now performs the reset.
5.) The machine completes this reset mode independently (ie the LEDs exits).

or

1. Disconnect the mains plug
2. Press and hold all three buttons (single reference + double reference + steam)
3. Insert the power plug
4. The brewing group is positioning itself
Release buttons 5. After about 5 sec. From the start of Brühgruppenfahrt

or:

Pull out the plug from the wall socket -
While holding flush button and "prefix-ground coffee" button and plug in the mains plug when pressed keys -
- Release keys only when the machine is no longer sounds.

5.2 machines display:

Pull out the plug, press power button and P / menu, NS back in, wait until the machine is no longer stirred (the BG moves yet, and stops in the Standartpostion) - Release buttons.


State of repair / maintenance FAQ: 03/18/2015

This thread will be updated continuously. Suggestions and additions takes the Coffee World team are welcome.

Greeting
Gregor

Thursday, 8 January 2015

The Endon Enluce EL-10085 specifications

This is all printed on the box.  Why's it so difficult to find these specs on the web?
(Also, note that 6500K is more normally classified as daylight than cool white.)


Thursday, 11 December 2014

Searching for a field with a particular value in ADXStudio Portals...

...or perhaps the underlying Lucene.Net.
The Lucene index includes a field named _logicalname which contains the entity type, e.g. kbarticle, incident.
You think and are told that you can search for a specific value in a field - and thereby limit your results to entities of a particular type - by adding "_logicalname:kbarticle" into your query string.
You might find it doesn't work.
The reason appears to be that "kbarticle" gets truncated to "kbarticl" in Lucene.Net's search query.   (I'm guessing it's to do with stemming or something.)
The simple fix is to wildcard the value a bit by appending an asterisk.  A search for "_logicalname:kbarticle*" works.   (Actually, a search for kbarticlee seemed to as well.)

(There are other programmatic ways to restrict the entities that are searched for, but in my case I wanted to be able to perform a null or blank search that would return results for all entities of a particular type.  You can't actually search for null or blank, but a _logicalname search was a suitable equivalent.)

Monday, 6 January 2014

Thinkpad W500 hard drive upgrade problems.

I upgraded to a 480GB Crucial M500 SSD.    Window 7.  Lenovo Thinkpad W500.

(Used Windows Backup and Restore to create a System Image, then replaced the hard disk, then restored.  Tried various other copy-tools but they wouldn't work via the SATA interface plugged into my USB socket.   Note that Windows *did not* get the hard-drive alignment correct when it did the restore.  I checked the alignment using a tool called AS SSD Benchmark, then fixed it using the MiniTool Partition Wizard.)

All seemed to be running well enough, but Windows Update wouldn't work and the underlying problem was the "The Cryptographic Services service failed to initialize the Catalog Database. The ESENT error was: -583." error in the event logs.

Checking the System32\Catroot2 directory there was a dberr.txt file containing lots of JET and other errors. The database files seemed to be missing under the {F...some-guid} folder.

The problem is something to do with Windows not understanding the "Advanced Format" of the new disc - something to do with 4096 rather than 512 byte sectors.

Using the Microsoft fsutil tool confirms this.  [Try googling "Microsoft Advanced Format Support" or something similar - there's a patch that you need to get installed that includes this tool and allegedly Windows support.  Since Windows Update isn't working, it errors when you try to install it.  You need to use 7-zip to grab the CAB file from the archive and then install that manually (somehow - google!).]
Try "fsutil fsinfo ntfsinfo c:" in an elevated command prompt and you'll see:
The Bytes Per Physical Sector will be "not supported".

Now you need to get a suitable driver.   There doesn't seem to be a correct one labelled for the W500, but one that works is in a package which lists the W510 as supported.  
Look for:
Intel Rapid Storage Technology Driver
g1io15ww.exe
581.62 KB
Windows 7 64bit,
Windows Vista 64bit,
Windows XP
11.2.0.100628 Mar 2013

on the Lenovo site.
Run and extract that, and then go to Device manager and update the driver for the 
IDE ATA/ATAPI Controllers -> Intel(R) ICH9M-E/M SATA AHCI Controller device - browsing to the directory that you just extracted all those files to.  (It'll pick up the file automatically.)

Before you reboot, you might as well stop the Cryptographic Service and rename the System32\Catroot2 directory.
After you reboot, you should see that this directory gets rebuilt and log files appear and disappear as that's happening.  [Other posts mention this taking an hour, but that's probably on a standard HD.  On the SSD, it took about 5 minutes.]
The fsutil command should now give you 4096 instead of "not supported".

Try Windows Update again!

Wednesday, 13 November 2013

How does the Sharepoint 2010 Client Side Object Model do its Optimistic Concurrency checking...

or "How can you check if a list item has been changed since you retrieved it?"

[Anyone who said to use the "Modified" date, go wash your mouth out!]
I'm pulling items out of lists in a WEB API service app and supplying the data to a client app in a custom format.
The client might pass data back requesting updates - but before I use the CSOM to perform the update I want to make sure that no-one else has updated the list-item in the meantime.
So bascically I want the equivalent of a Hibernate / nHibernate version property to pass / return / check over the wire.
Within your list-item you'll find the hidden field owshiddenversion .  That's the one whose value increments every time the list item is change.

Monday, 3 December 2012

Weird cause of Msg 3989 / "New request is not allowed to start because it should come with valid transaction descriptor"

Running a query against SQL Server 2008 R2 using SQL Server Management Studio (or wot I sometimes and apparently-mistakenly call Enterprise Manager), I got back the error...

Msg 3989, Level 16, State 1, Line 1

New request is not allowed to start because it should come with valid transaction descriptor


This was a slightly tricky query I'd been building up and it used a table-value function (i.e. a user-defined function that returns a table type) which ran against a Linked Server's tables, joining that to local tables.

A quick google gave many hits about ADO.Net pooling and suggestions to upgrade things to latest service-packs.  In my case though this wasn't the problem.

All I needed to do was fix the table-value function, which was throwing a datatype-conversion error.  (I'd made a quick amendment and hadn't tested it outside the bigger query.)